Metrics Relay Documentation
Automate your Notion reporting with scheduled PDFs delivered directly to email and Slack.
Metrics Relay acts as a bridge between your Notion databases and your team. By generating beautiful, snapshot PDFs of your data, we ensure everyone stays aligned without needing to log into Notion constantly.
- Automated PDF snapshots
- Slack & Email delivery
- Smart status charts
- Advanced filters (Date, Status, Assignee)
- Secure OAuth connection
Authentication & SecurityOAuth 2.0
Security is our top priority. Metrics Relay uses the official Notion API and OAuth 2.0 protocol to ensure we only access what you explicitly share.
How it Works
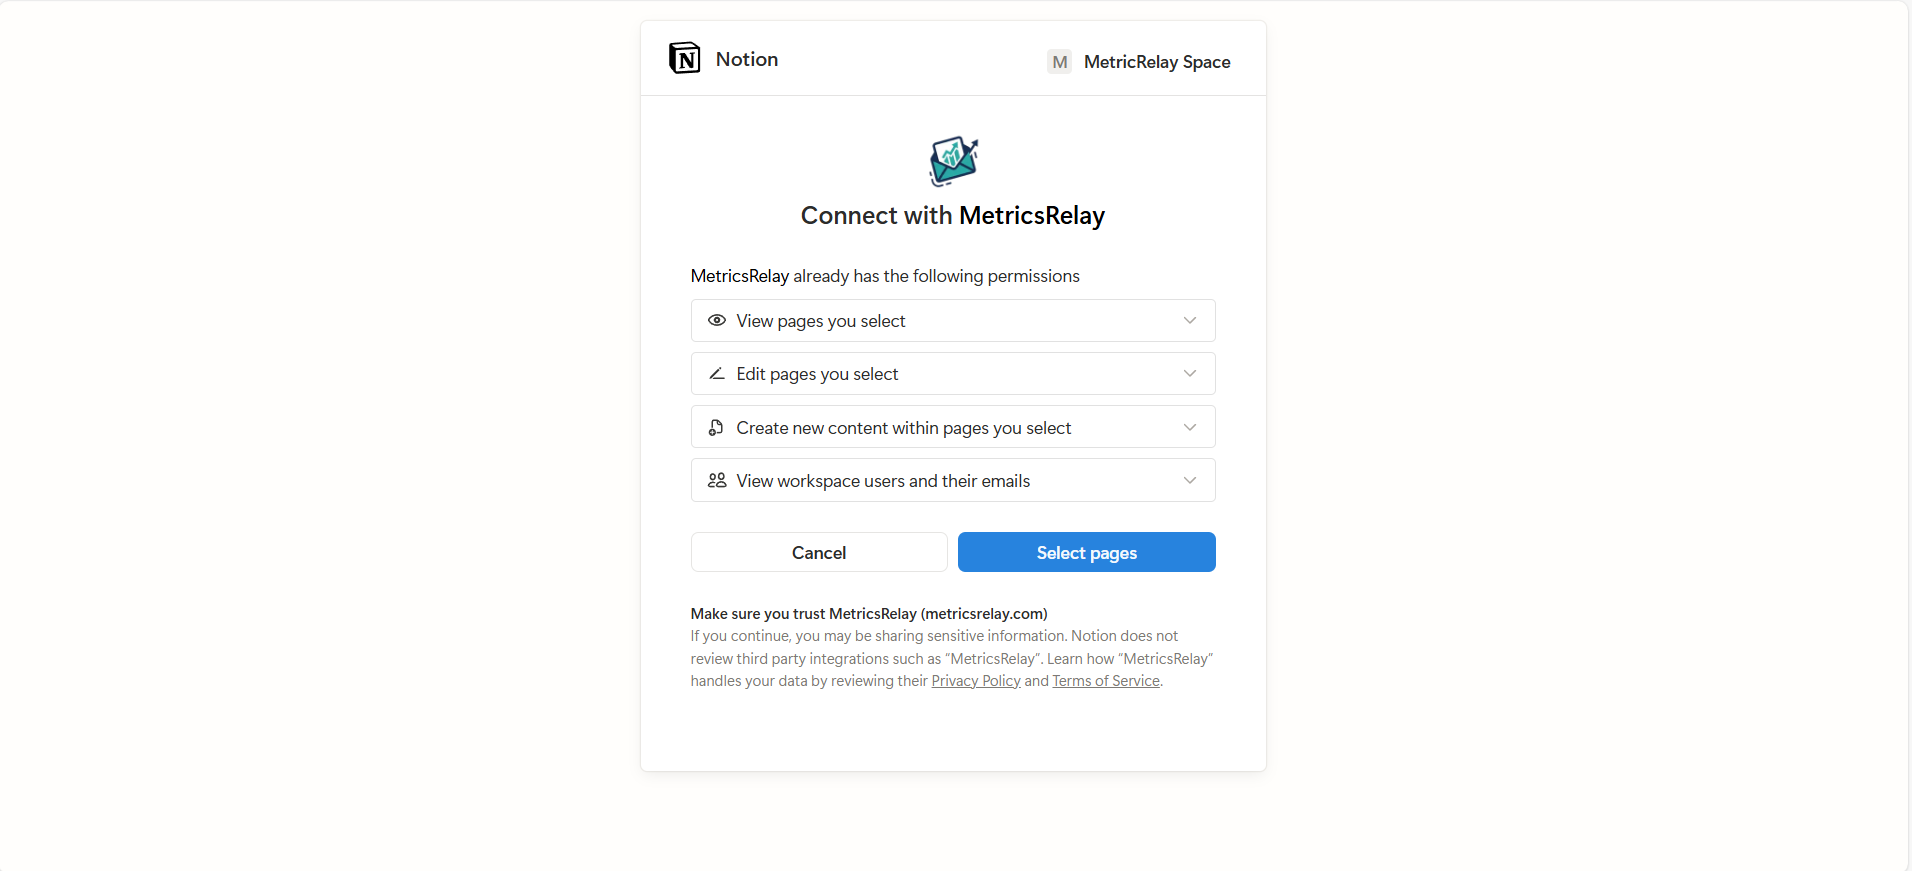
- Connect Notion: When you sign in, you'll be redirected to Notion to authorize the integration.
- Select Pages: You must explicitly grant access to the specific pages or databases you want Metrics Relay to see. We cannot access your entire workspace by default.
- Token Storage: Your access tokens are encrypted and stored securely. We use these tokens only to fetch data for your scheduled reports.
Creating Reports
Creating a report is a simple four-step process: Select, Map, Filter, and Schedule.
1Select Database
Choose any database you've shared with the integration. If your database isn't showing up, ensure you've granted access to it in Notion via the "Connections" menu (3 dots > Connections > Add connections > Metrics Relay).
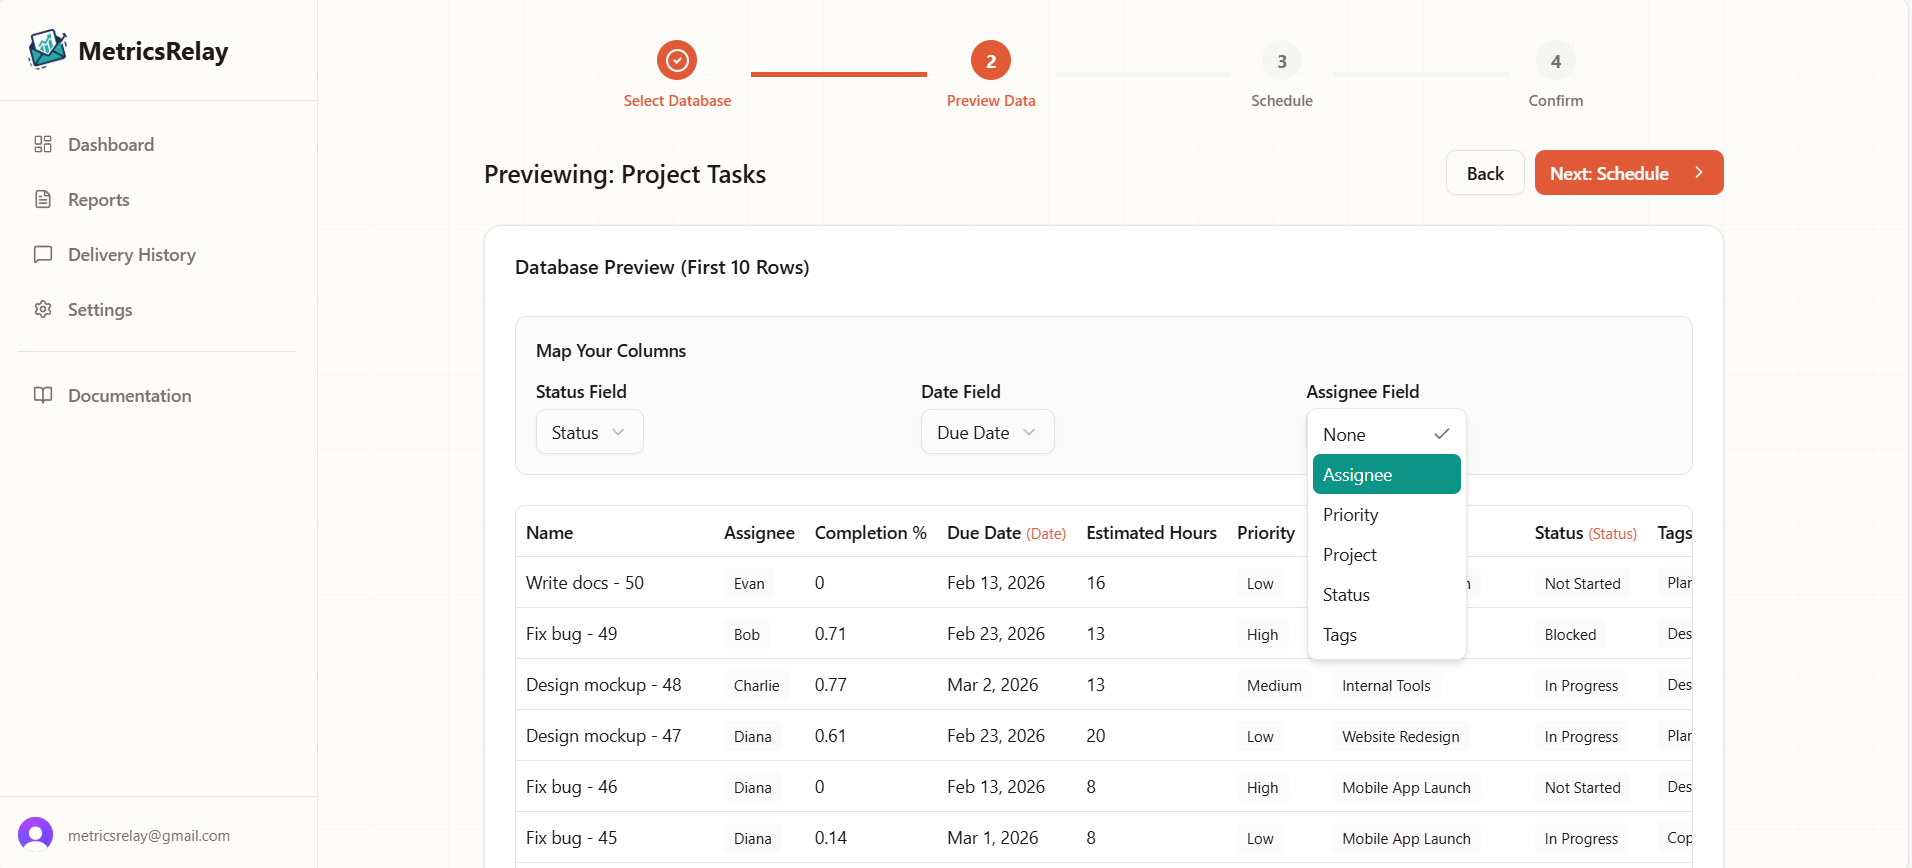
2Map Columns
To generate smart visualizations, we need to know which columns represent key data points:
- Status Field
Used to generate bar charts showing the distribution of work (e.g., "To Do" vs "Done"). Charts are automatically generated for reports with more than 10 items.
Compatible column types: Status, Select
- Date Field
Critical for "Relative" time filtering (e.g., "Last 7 Days"). If you don't select one, we default to the page's "Created Time".
Compatible column types: Date, Created Time, Last Edited Time
- Assignee Field
Allows you to filter the report by specific team members (e.g., "Show only tasks assigned to Sarah").
Compatible column types: Person, Created By, Last Edited By, Select, Multi-Select
3Filters
You can refine what data appears in your report using our compound filter logic:
- Time Range: Filter by "Last 7 Days", "Last 30 Days", etc. This ensures your weekly report only contains relevant items.
- Status & Assignee: You can choose to only show items that are "Done" or assigned to specific team members.
*Logic: Filters are applied as (Date Match) AND (Status Match OR Assignee Match).
4Schedule & Delivery
Configure when and how your report gets delivered:
- Frequency
Choose Daily, Weekly (pick your day), or Monthly (specific date or "Last day of month").
- Time
Select when reports should be generated and sent (e.g., 8am, 9am, 5pm).
- Delivery Method
Choose how to receive your report:
- Email only – Send to one or more email addresses
- Slack channel – Post to public or private channels
- Slack DM – Send directly to team members' DMs
- Both – Combine Email + Slack for maximum reach
Managing Your Reports
The Scheduled Reports dashboard is your control center. Here you can see all your active automations in one place.
- Checking Status
See at a glance which reports are Active and when they will run next.
- Pausing Reports
Need to make changes to your Notion database? Pause your report to stop it from sending until you're ready.
- Test Run (Send Now)
Want to see how your report looks immediately? Click the "Send Now" button to trigger a one-time delivery to yourself.
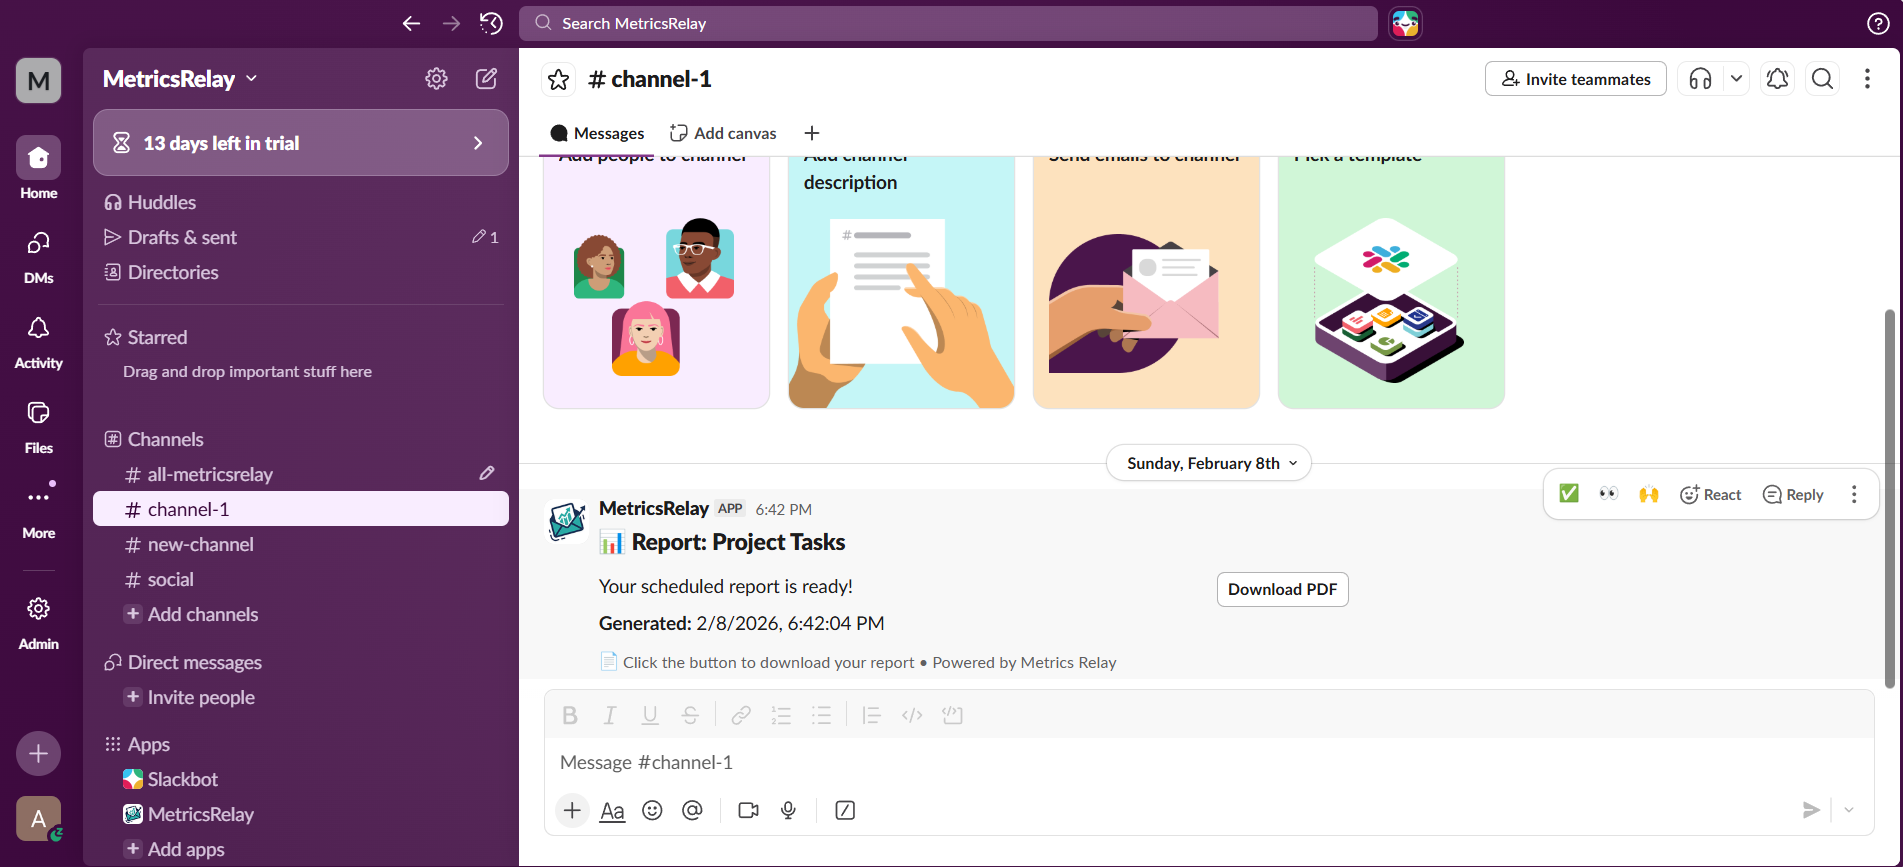
Delivery History
View a complete log of every PDF generated and sent. We store your history so you can audit delivery or retrieve past reports.
See exactly when each report was sent and its status (e.g., ✓ Sent or ✗ Failed).
Every entry includes a Download button to retrieve the exact PDF snapshot that was sent to your team.
How Reports Are Delivered
We use a robust system to ensure your reports are delivered reliably, even during peak times.
Deliver reports directly to your team's workspace.
- Channels: Public or private
- Direct Messages: Personalized DMs
- Interactive: Download buttons included
Powered by Resend for high deliverability.
- Secure Links: Direct PDF downloads
- Reliable: Retry logic included
- Clean Design: Minimalist styling
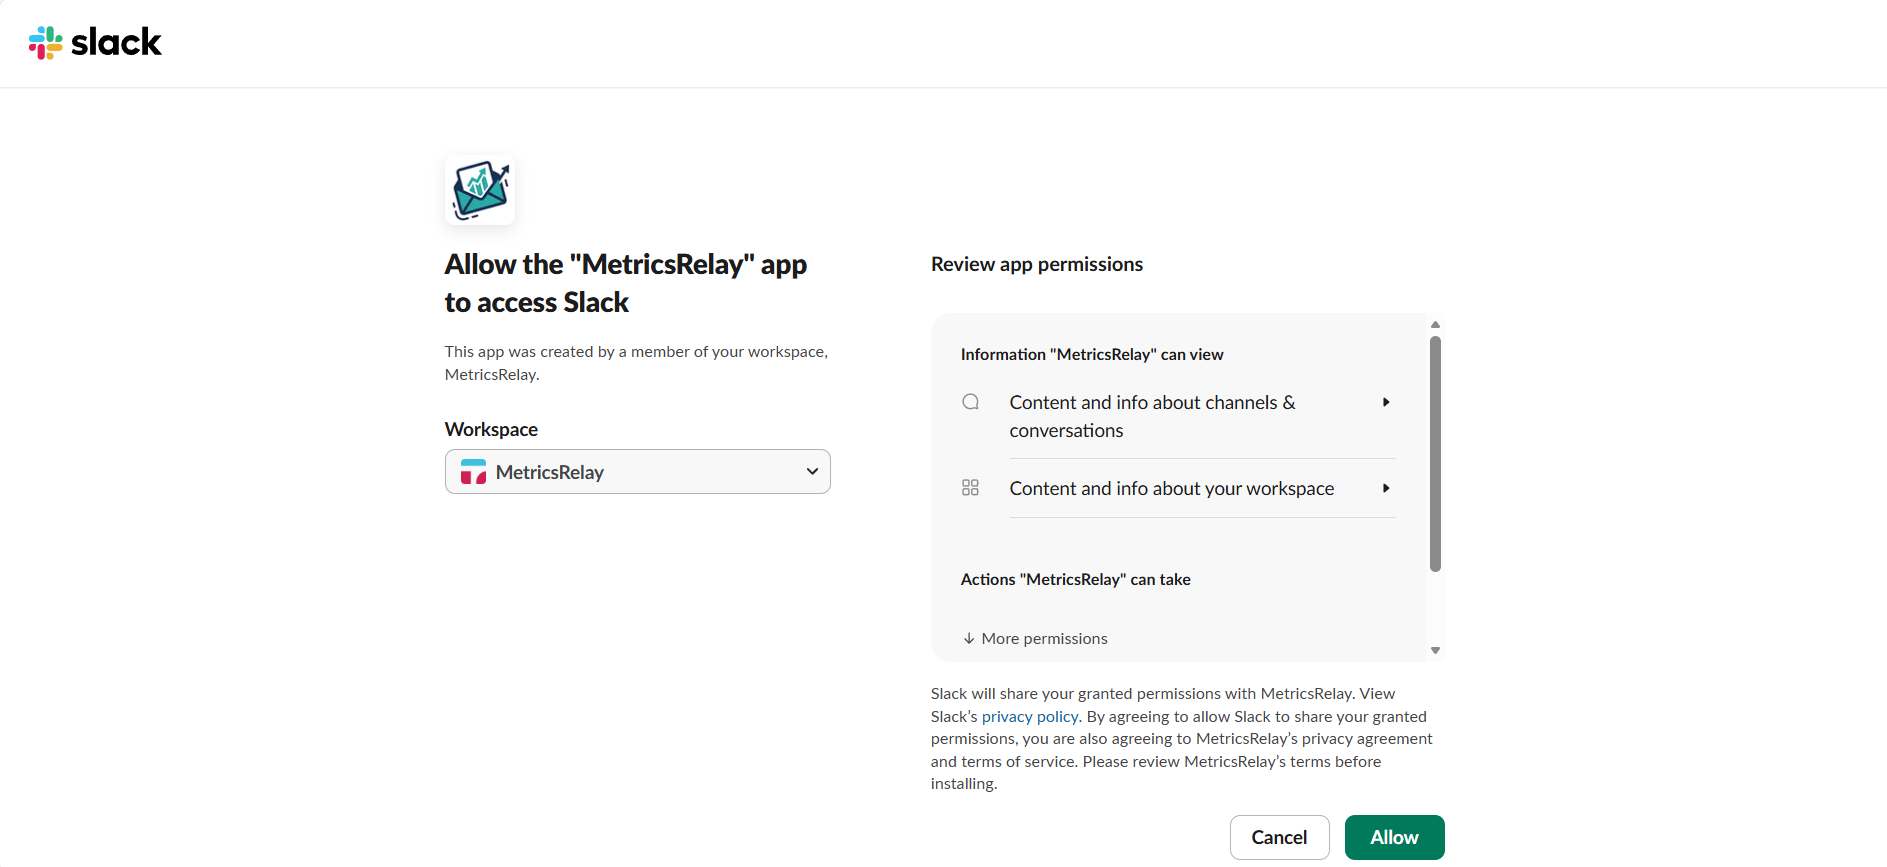
Connecting Slack
To receive reports in Slack, you first need to authorize the Metrics Relay bot in your workspace.
1. Connect your Workspace
Navigate to the Settings page in your dashboard. Under "Integrations", click the "Connect Slack" button. You will be redirected to Slack to approve the app.
2. Invite the Bot
Go to the channel where you want to receive reports (e.g., #general) and type:
3. Sending to DMs
You can also deliver reports directly to individual team members as Slack DMs:
- When creating or editing a report, select "Slack DM" as a delivery method.
- Use the DM Recipient Selector to search and select team members from your workspace.
- Selected users will receive the report as a private message with a PDF download button.
*Note: You can combine DMs with channel delivery and email for maximum reach.
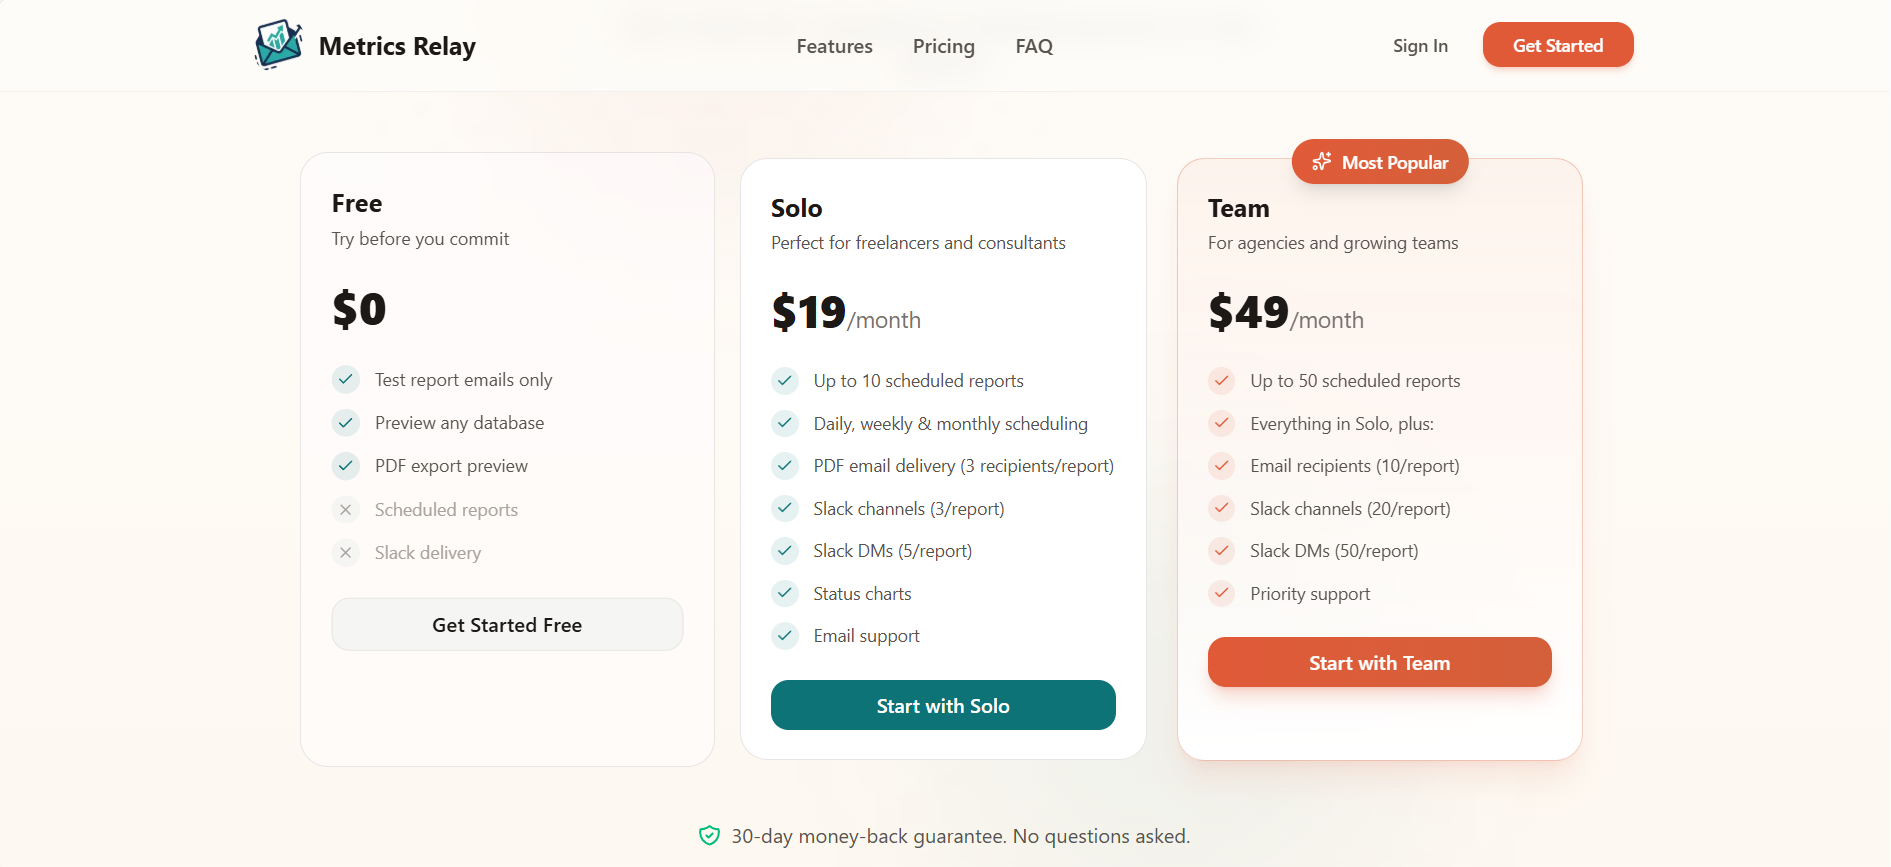
Billing & Plans
Choose a plan that fits your team's size. All plans include full access to the report builder.
- Manual report runs only
- 1 Email recipient
- 10 Active Scheduled Reports
- 3 Email Recipients per report
- 3 Slack Channels per report
- 5 Slack DMs per report
- 50 Active Scheduled Reports
- 10 Email Recipients per report
- 20 Slack Channels per report
- 50 Slack DMs per report
What happens when I downgrade?
If you downgrade your plan (e.g., Team to Solo), we automatically pause the oldest reports that exceed your new plan's limits. We do not delete them; you can manually choose which ones to reactivate.
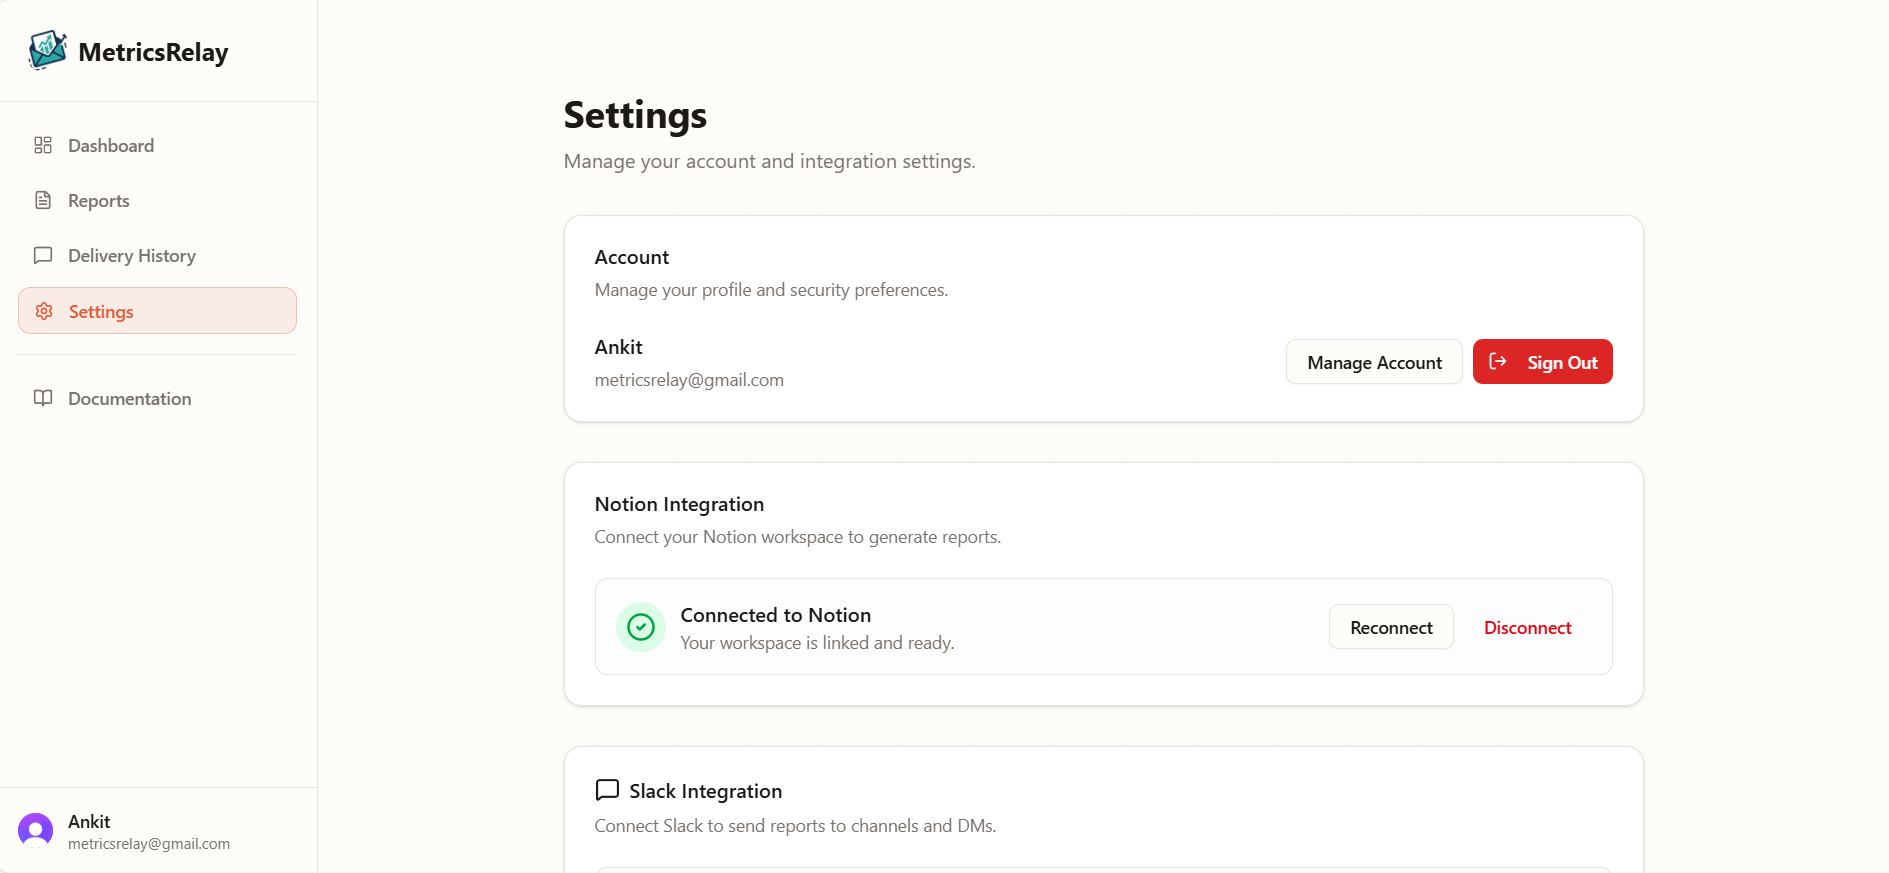
Settings & Account
Manage your global preferences and account settings.
Integrations
Manage connections to external tools.
Connect or disconnect your Notion workspace. You must be connected to generate reports. We only access pages you explicitly share.
Connect your Slack workspace to enable delivery to public channels, private channels, and direct messages.
Billing
Manage your plan and payment details.
View your current plan usage, upgrade to Solo/Team tiers, or manage your payment method via the secure customer portal.
Account
Update profile and session settings.
Update your personal details (name, email) by clicking "Manage Account" in the settings page.
Click the Sign Out button to log out safely.
System Limitations
To ensure the service runs smoothly for everyone, there are a few limitations to keep in mind:
| Constraint | Why? |
|---|---|
| Max Rows per Report | Limit is 5,000 rows. Prevents generation timeouts. |
| Data Freshness | We fetch data from Notion at the exact moment the report is generated. |
| Slack Rate Limits | If you are sending to many channels at once, delivery might be spaced out by a few seconds to comply with Slack's rules. |
Troubleshooting
The most common error for Slack delivery. You must invite the bot to the channel first, especially for private channels. Type /invite @Metrics Relay in the channel.
Charts require at least 10 rows of data to be meaningful. If your report has fewer items, the chart section is automatically hidden to save space.
Go to the specific database in Notion, click the "..." menu in the top right, select "Connections", and verify "Metrics Relay" is listed. If not, add it via "Add connections".
Need help with anything?
Whether you're stuck on a step, found a bug, or just want to request a feature, our team is ready to assist you personally.